 |
| Read about Miles' story here. Learn about Icing Smiles here. |
I was also told I could incorporate the goldfish from "The Cat in the Hat."
Great.
I think I can draw pretty well, but we're talking about the art of Dr. Seuss here. And a highly unusual looking Birthday Bird, no less. In confectionery form, no less.
This was the perfect opportunity to break out the "icing transfer" technique, which would allow me to trace out exactly an image I want on my cake. Except instead of creating transfers out of buttercream or royal icing to apply to a flat surface of my cake, I used candy melts, creating more vivid, solid pieces that could stand up or be used as a cake topper. And I took pictures along the way.
What you'll need:
- Your desired pictures(s) printed out in mirror image.
- Lots of parchment paper - to make parchment triangles, and for the transfers.
- Flat surface to work on, ideally one you can move around e.g. cutting board or cardboard cake circle.
- Strong tape
- Candy melts in the colors of your image
- Ramekins/small bowls and spoons for melting and mixing candy
I started by sketching out the design of my cake (topsy-turvy, obviously!), trying as much as possible to keep it to scale. This way I would know how tall I'd need my candy transfers to be.
I decided on 6 inches each for the birthday bird and goldfish, and 4 inches in diameter for the greeting plaque.
Sketching also helped me visualize my design and decide on colors and placement of my decorations.

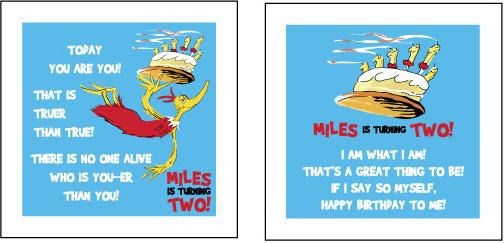
You also want to flip your picture horizontally to create a mirror image - you'll be tracing over the image in candy and then flipping it over again to reveal the finished product. This is especially important when you're working with letters/numbers.
Print out your images... (note the "Miles is Two!" is in mirror image)
... and trim away the excess white space around it.
Tape the image down onto a flat surface - not your countertop, but something you can move around. Being able to move your image means less work for your hands when you're tracing later. You also want to be able to move your candy transfers out of the way, or into the fridge, when it's time to let them set up.
A sturdy cutting board does a good job. Avoid anything that's even slightly warped or not perfectly flat, such as a cookie sheet. Any bend in your surface is going to result in a bend under your melted candy, which will amount to a break in your hardened candy.
Next, cut out parchment paper so it more than covers your image, and tape it down over your printouts. Securely! I used packing tape and lots of it. Parchment paper is, after all, notorious for being un-sticky. You really don't want any of this to move around while you work.
Prepare parchment cones (a.k.a. parchment triangles), one for each color candy you'll be using.
There are websites galore that offer instructions on how to make these, but I haven't found one yet that shows how I make them, which is super easy of course. I'll put "make a parchment triangle video tutorial" on my endless list of things I should post on this blog.
Now we want to start melting our candy. Begin with a color that you'll be using for the outlines and accents. In this case, it's black.
Unlike making cake pops, you only need to melt a small amount of candy each time, only enough to fill your parchment cone. Ramekins are the perfect size for melting.
*One exception: if you're mixing up a custom color, you should melt up a big batch at one go - you want to avoid running out and having to try and match the color you already made. I mixed my own orange for the goldfish.
Melting: start with 30 seconds in the microwave and start mixing it hard with a spoon, even if it doesn't seem like it's melty yet. Then heat in 5 second increments only, adding a tiny dab of vegetable shortening if it looks like it needs help liquefying. It's imperative you not overheat your candy or you'll risk scorching it and will have to throw it out.
Avoid trying to "draw" directly onto the lines. Instead, use the "string" technique to help keep your piping neat.
Elevate your piping tip a little off your decorated surface, and let a short "string" of icing form. Move your icing tip guiding the "string" so it falls onto the line you are drawing. Unfortunately, I had a hard time capturing a picture of this in action.
Here's a look at the birthday bird and the greeting plaque with their black outlines and accents completed. (Note the "BB" in mirror image)
The goldfish is a good example to illustrate the importance of the color order for the candy. The outline and accent lines are completed first, in black, along with the fish's iris, which you can't see here.
Next the white of the eye goes in, over the black iris that's already been piped.
Finally, the orange will go in over everything.
Using a toothpick will help you get into all the nooks and crannies within your candy outline. You really don't want to miss any spots (you'll see why later.)
Finally, when you're done with all your colors, you want to "fortify" your transfer with a thick coat of melted candy.
If you're making this as a cake topper, this is also the step where you would lay down a lollipop stick and cover it all with gobs of melted candy to attach it properly.
Leave your transfer(s) to harden. The thicker your layers, the longer it will take. Mine took about 30 minutes, but to be safe you should leave it for as long as you can. Refrigerating will speed up the process.
When you're transfer is good and hard, gently slide a sharp knife under your pieces of tape to free the parchment from your cutting board. Gently flip your parchment transfer over. And then gently peel the parchment paper off.
Alternatively, you could not flip your transfer over, and gently slide it back and forth over the edge of your cutting board, a little by little, gently peeling the parchment down and away. Either way, I think you get my drift: do it GENTLY.
The greeting plaque was fine too, but it's a good example of why you really want to get your candy in every last nook and cranny.
Take a look at the air pockets visible on the surface here. This is due in large part to the fact that I didn't use a parchment bag for the blue candy, but instead just smeared it on with the back of a spoon.
(Apparently I didn't learn my lesson when I was making the candy shells for my "Finding Nemo" cake, except as you may recall in that case, the added roughness actually worked in my favor.)
The birthday bird ended up being the most problematic, because it was the most delicate of the 3 transfers. This is a fine example of what can happen when you don't "fortify" your entire transfer with an extra layer of candy - the Birthday Bird's leg didn't stand up to even the slightest movement during the removal process.
You can't see it here, but poor Birthday Bird was also decapitated because his neck wasn't strong enough to hold his head. And that was even before I tried to remove the transfer.
Still, I'm really excited by how it's looking and I figure I'll be able glue it all together later with more melted candy.
Decorations done. Now all that's left to do is, oh, create a two-tiered topsy-turvy cake covered in fondant! Photo tutorial to come.
No comments:
Post a Comment